To upload images to the DevKit, you must first be logged into DevKit and then follow these steps:
- Click on the Content Library menu option and then select Manage Images:
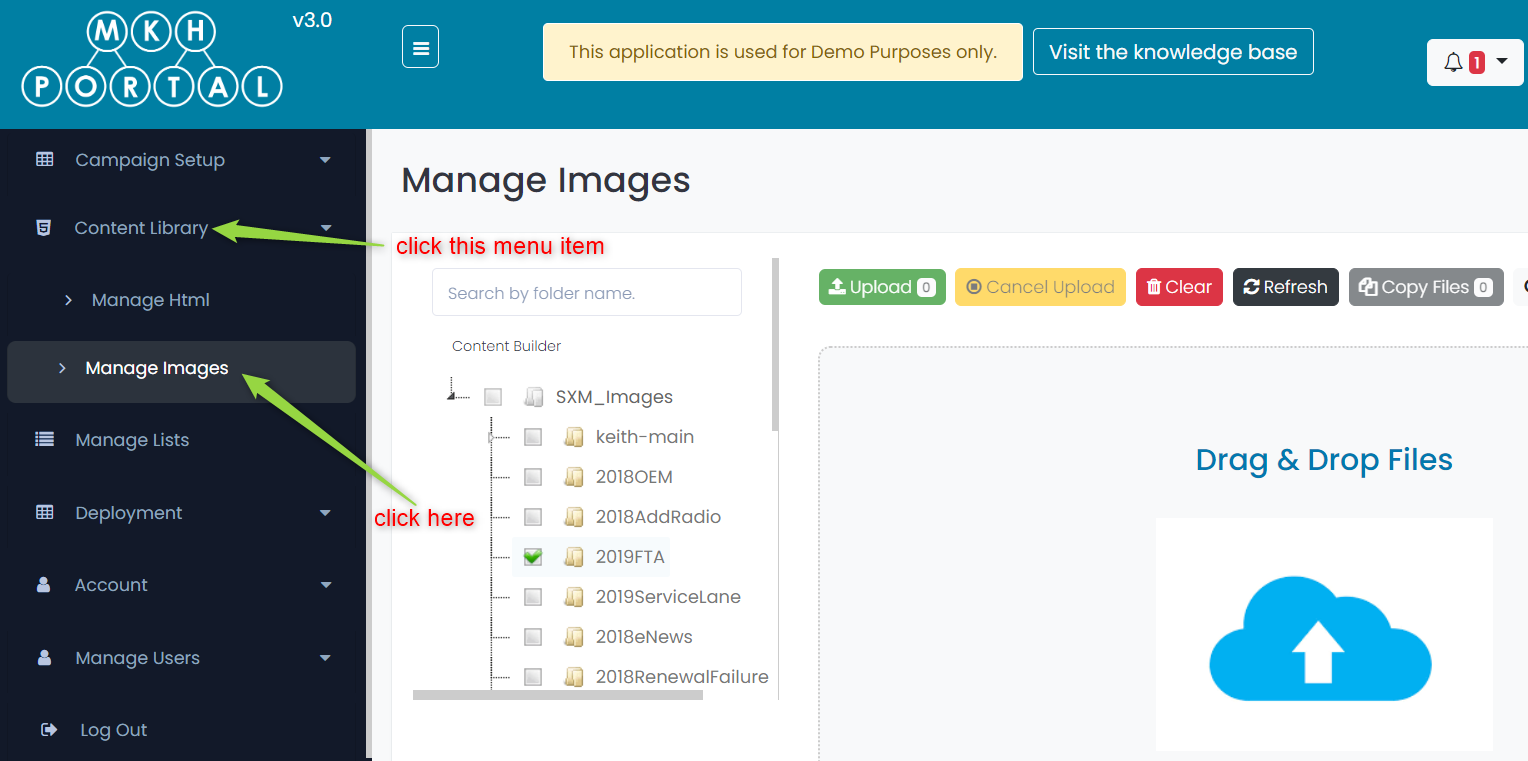
- Navigate to the folder that you want to upload images to by expanding folders and selecting the folder name by clicking on it:
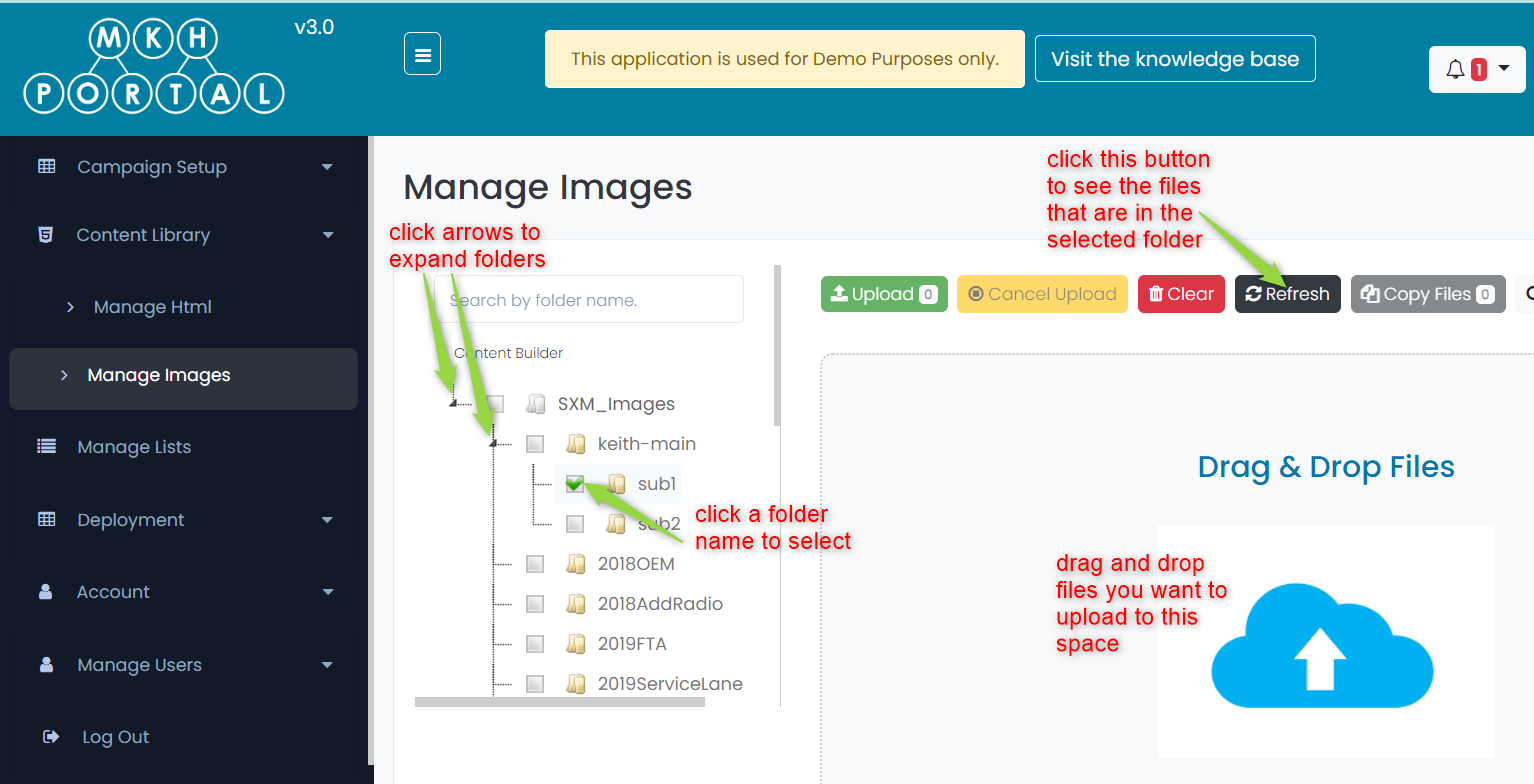
Note: Folder contents will not automatically display when you select a folder. To see a list of the files in a selected folder, you must click on the Refresh button as shown in the image above. - Drag and drop image files that you want to upload into the area that says “Drag & Drop Files“. When you do this, the image files will be displayed as shown in the example below:
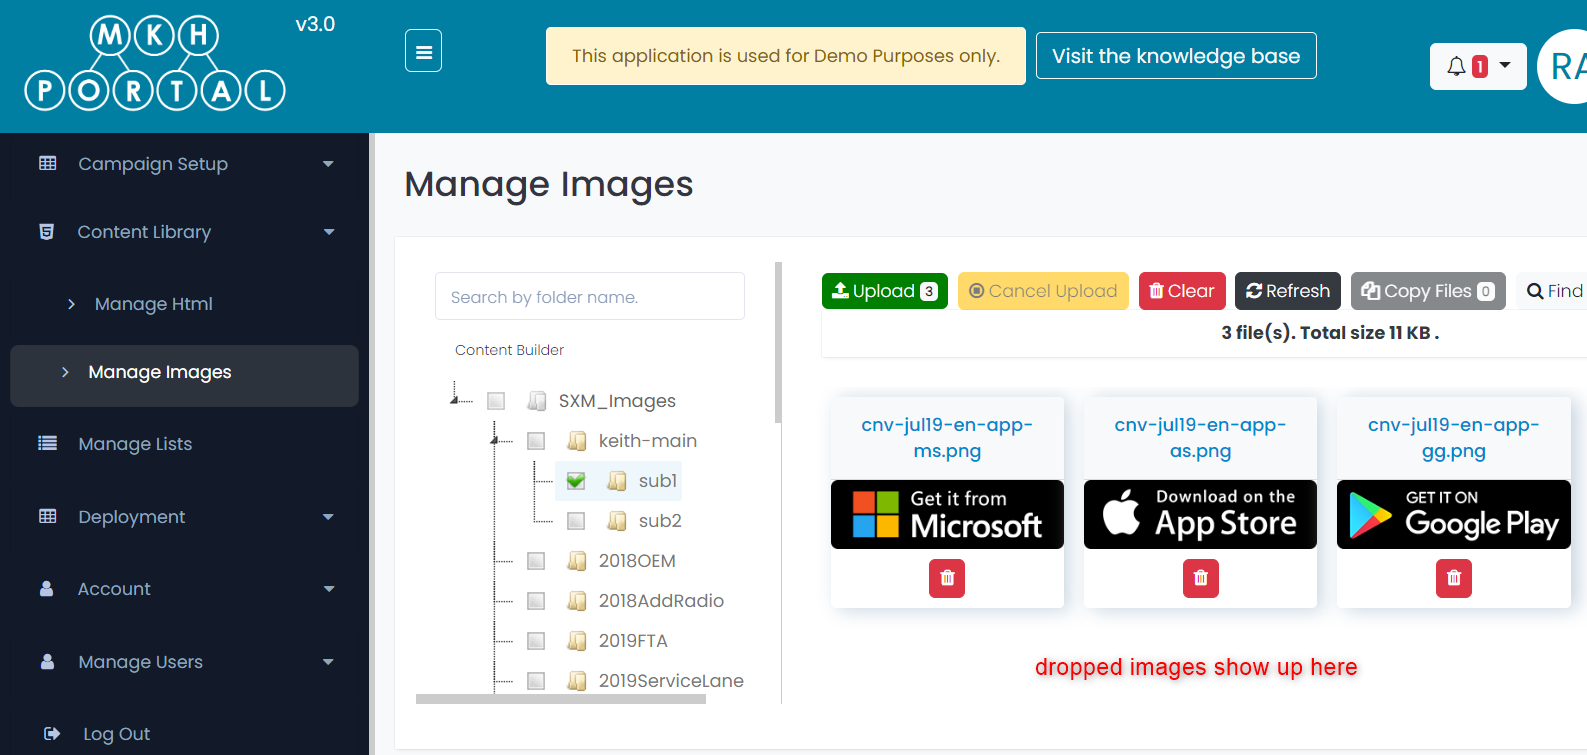
- To upload the images that you dragged and dropped into the selected folder, click the Upload button (the button displays the count of the images that will be uploaded):

You will receive a confirmation message that image files have been successfully uploaded.
Note: You cannot upload an image with the same filename as one that already exists in a folder, and you cannot copy an image file to a folder if that filename already exists. If you try to upload an image and the filename already exists, you will receive an error like this: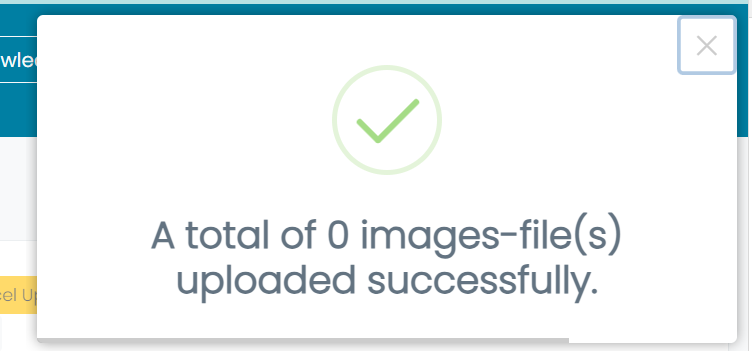
If you try to copy a file to a folder and the filename already exists, you will receive an error like this: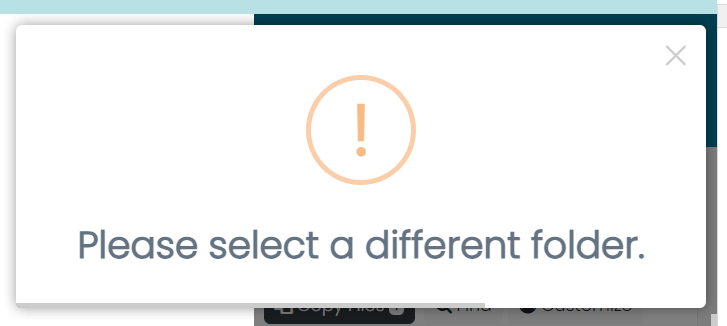
- Other options you have available to you include:
 Cancel Upload: If you have started an upload of files and you wish to stop it, click this button
Note: this option will not reverse any files that have already successfully upload, only files that are not yet completed
Clear: This button removes the list of files so that you can drag and drop additional files for upload
Refresh: clicking this button will display the list of files in the selected folder
Copy Files: if you have any files selected in the list, you can click the Copy Files button to copy these to a different folder. You will be prompted to select the folder that you want the files to be copied to. - Finally, you have a few options available to you to copy or export the list of files that are displayed for a folder:
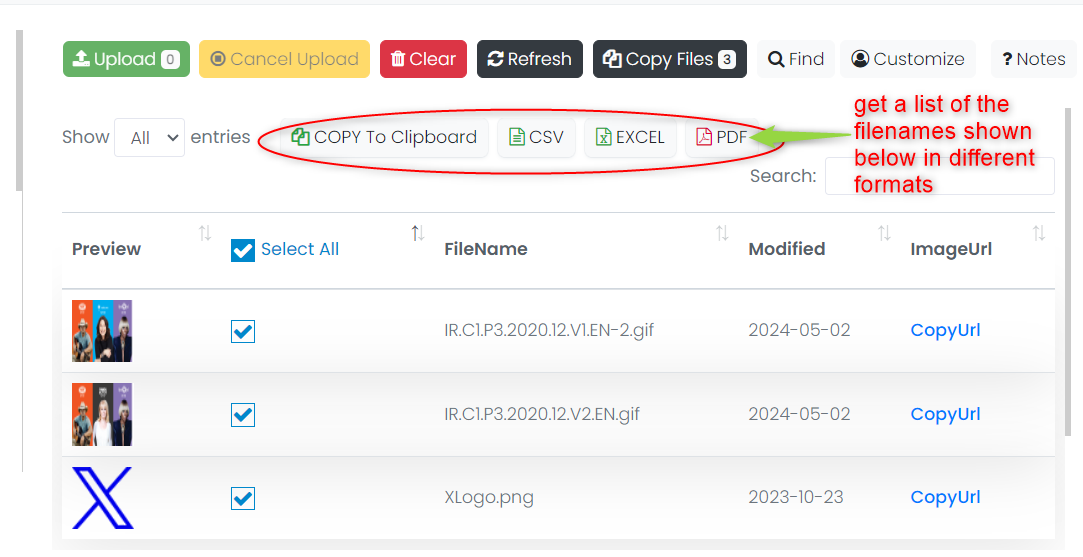
You may also click on any of the “CopyUrl” links to copy the URL for the image to the clipboard.